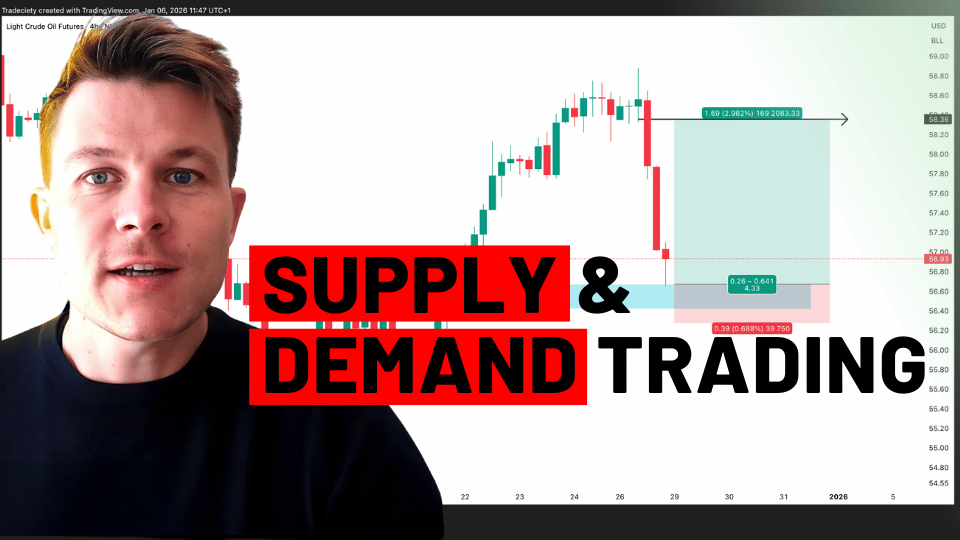
Supply and Demand Trading in 2026
We have been trading supply and demand strategies for over ten years, and they have stood the test of time remarkably well. Supply and demand is...

Understanding “Space vs Traffic” – The Key To Big Trades!
As traders we all love the feeling of having to see a trade run straight into profit right after entry, and it’s always a pain having to wait for the slow ones to gradually turn us a profit (hopefully!).
This article is going to elaborate the technical aspects of financial markets that are almost always behind the mechanics of big trades versus the annoying struggling ones.
It’s fairly common among traders to want to focus almost entirely on nailing the entry trigger. While the entry is of course a critical aspect of a well-developed trading system, it does not solve all the problems associated with stressful trading.
If you have traded for any length of time, you would know that one of the most annoying moments as a trader is when you think you’ve nailed down a really good trade (based on the set of rules that must be met for you to enter the market) yet still the trade often struggles to break in the green for you.
Let’s try and add another tool to your arsenal – or another rule per say – that will give you the peace of mind of frequently entering trades that run in the green right from the onset!
That rule is grounded in the concept of ‘Space’ vs ‘Traffic’. Yes these concepts are exactly what they literally imply – only that they are applied in the context of trading.
Space:
Space is defined as a definable region on your chart that is poorly populated with horizontal support and resistance levels from the past or prior bar highs and bar lows that ‘stick out’.
Simply put, space is literally just ‘free space’ on your chart for the trade to run in, without being in close proximity to a former support and/or resistance level.
Traffic:
Traffic on the other hand, as you might guess from the literal meaning, imply congested areas on the chart with elongated periods of sideways movement with plenty of indecisive bars and their highs and lows forming minor or major support and resistance levels.
Simply put, areas of traffic on the chart are marked by several points on the chart tucked into close proximity that could hinder the movement of price – and your chances of making a quick profit on a trade!
Let’s throw up a random chart and illustrate the concepts of space and traffic:
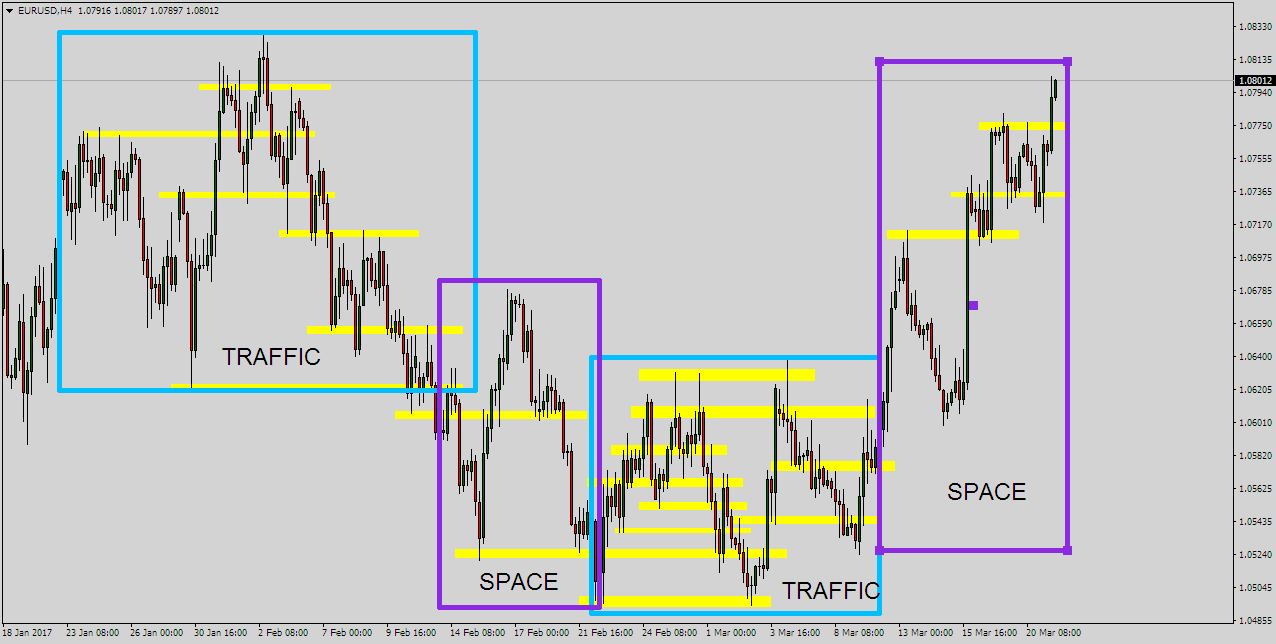
As you can see, areas marked by support and resistance areas clustered found together have been highlighted in the aqua colored boxes denoting “traffic”. Violet colored boxes show relatively more open spaces on the chart.
Also note the nature of price action itself in the traffic boxes compared to space boxes. Price action will be smoother (trendier…if that’s a word) when there is more space for price to glide through. On the other hand, it will be choppy and more sideways when it is caught up in traffic laden areas. This is an important cue in helping understand why some trades will run more than others.
Now that we have laid the foundations, we can move on to the golden rule of ‘homerun’ trades.
The rule states that as a conscious and a conservative trader, you should NEVER trade into traffic, and ALWAYS PREFER to take trades that are heading into space.
When price has more space to run in, it will – provided it, of course, has a reason to move in that direction (I am implying that you entered logically). In the context of an actual trade, this is solid information; because when you know your trade has ‘room to run’ it can lead to very straightforward trade management and often results in the trade running positive pips straight away.
Trading into space also yields another major advantage. You become highly efficient in picking out false signals. To understand this, refer the first couple of lines in the previous paragraph that are underlined. If you have picked the right trading signal, price should in your direction smooth and easy, and when it does not, you have a very logical reason to pull back your trade management (either killing the trade or taking other protective measures).
This objectivity goes missing when you are trading in traffic. Not only are you constantly biting nails as price drags and dances back and forth over nearby support and resistance levels and prior bar highs and lows, it also gets hard to distinguish between the regular choppiness of price action and a false signal. It is often not until you get taken out for a loss that you realize you misfired a trade (which is, of course, is inevitable in the probabilities game).
The key to determining whether you have ample space for your trade, is to simply identify the “first major trouble area” for price. This is the first major hindrance (a support and resistance level or a trend line) that could likely hold price from moving swiftly and smoothly in your direction.
Let’s look at some live examples to clarify what we mean by trading in space vs trading in traffic:
(Note that in the charts below, all horizontal support and resistance levels are marked in yellow, and areas of space are marked in Aqua color. Also for demonstration purposes, I will be using common candlestick patterns as trade triggers. I safely assume most technical trades use these formations pretty often in their trading anyway)

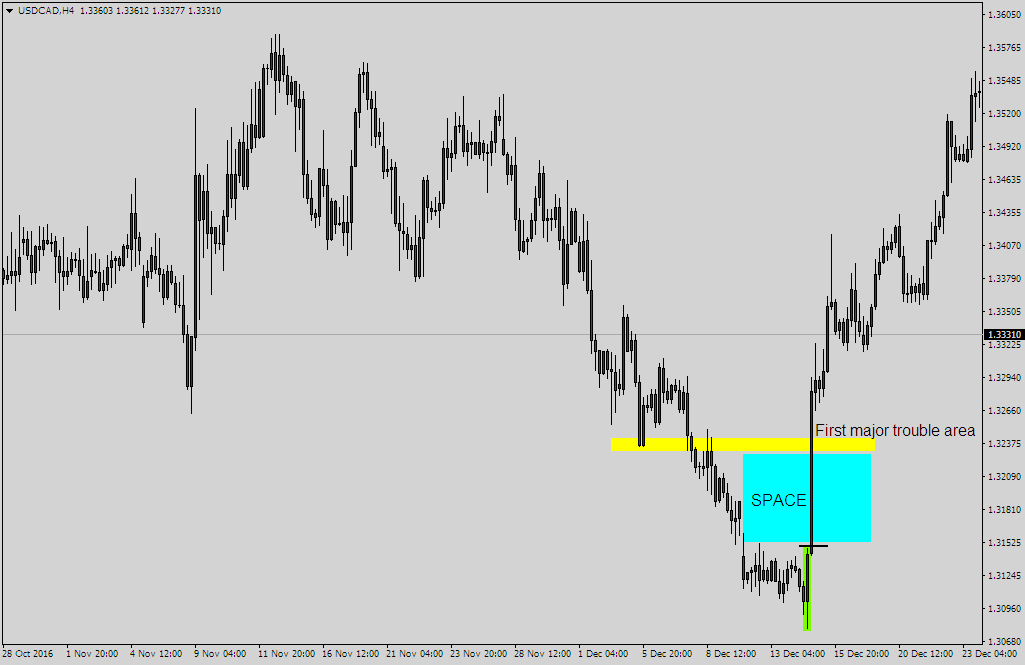
We are looking at a strong looking bullish engulfing bar pattern. Notice the area marked in yellow marking out a clear support and resistance level. Even more importantly, notice the big aqua-colored box just underneath. This box implies all the green pips that you can bag easily because of the space in between your entry (the small black dash) and first major trouble area marked in yellow.
It will not be unreasonable to take this trade and expect price to quickly hit the yellow region, giving you enough green pips up front.
Conversely, let’s consider a trade running into traffic:
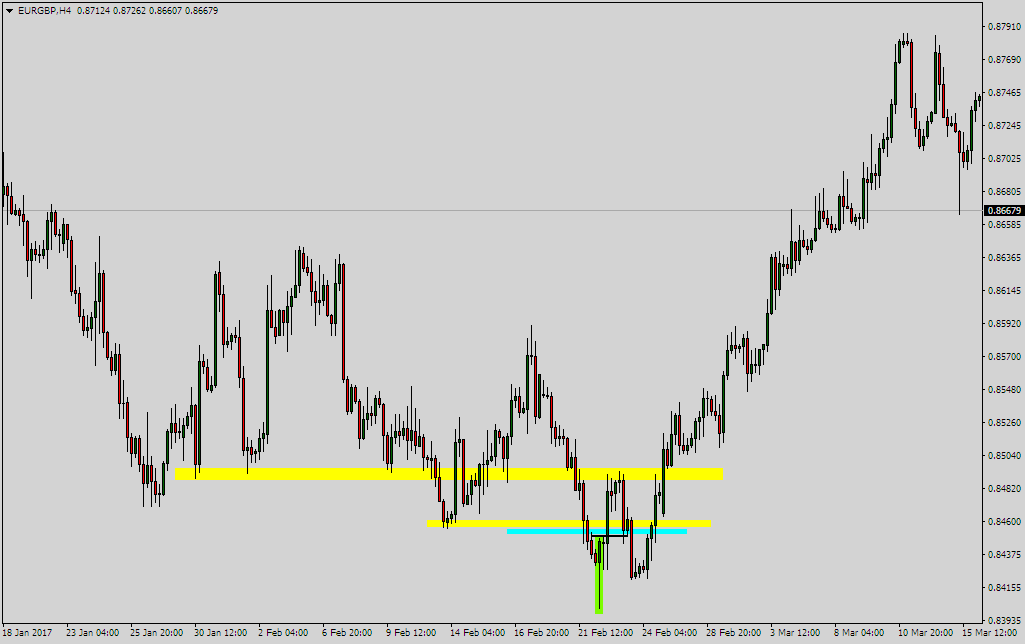
Again I have highlighted a bullish engulfing bar pattern in green. And boy did I struggle to squeeze in an aqua-colored box to denote the 5 pips of space this trade had before it was going to hit the first major trouble area denoted by the previous swing low.
In hindsight, price did actually push straight through, but notice how it rebounded just a few pips later at another critical (more long-term) support and resistance level. Notice the minuscule distance between our entry (again the black dash) and the first trouble area. I would not have been surprised a single bit had price just bounced off of that area nullifying the impact of the engulfing bar.
Then again, maybe the setup here was strong enough to push through, although trading in that kind of traffic is obviously flirting with danger.
Another example of a stress-free trade with nice space:
Notice that once the bullish engulfing bar here broke to the north hitting our entry, there were no prior swing points it had to battle against, until quite a few pips away where I have marked the first major trouble area in yellow. These are the setups we are looking out for!
And here’s another setup in traffic for contrast:
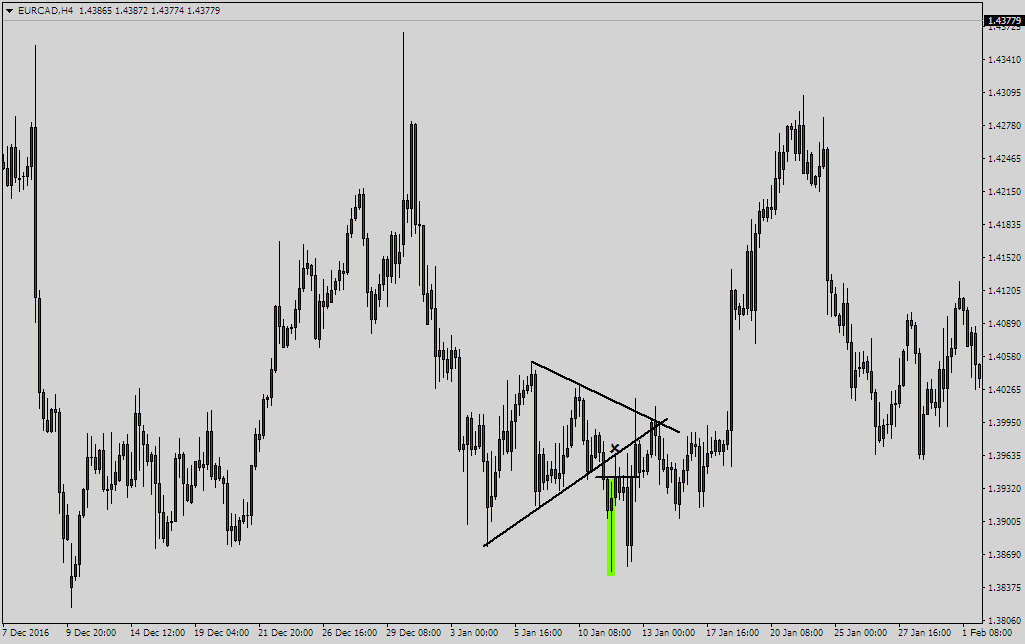
Again I struggled on this one to draw any length of a box at all to denote space here. Strong looking pin bar marked in green but headed straight back into an area of tight congestion marked by the black trend lines. Price literally hits the rising trend line a few pips away and bounces off almost taking out the pin bar.
Somebody who got sucked in by the strong look of that pin bar must have gone through some real stress on this one! Notice how price continues to just chop around for a long time before finally breaking out to the north. That’s because it was struggling for space until it eventually broke out of that consolidation phase.
As you may have noticed by now, the larger you can draw the aqua-colored box on your chart (i.e ‘demarcate’ space between your entry and the first major trouble area) the smoother you can expect your trade to unfold.
Let me now if you have any follow-up questions in the comments section below.

external link:

We have been trading supply and demand strategies for over ten years, and they have stood the test of time remarkably well. Supply and demand is...
3 min read
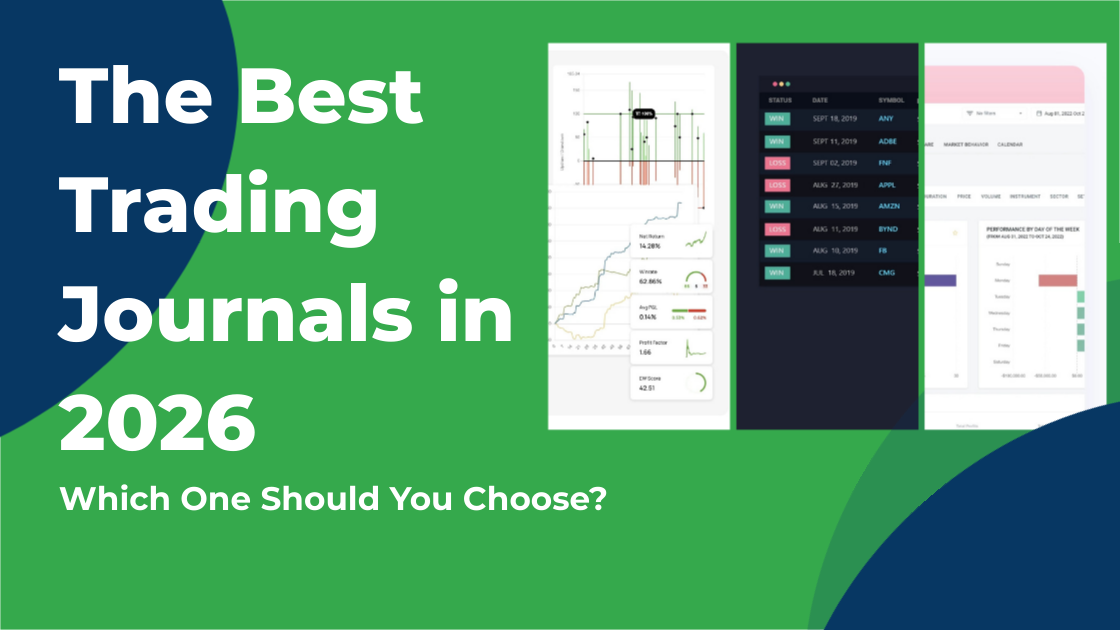
Choosing the right trading journal is essential for traders wanting to analyze performance, refine strategies, and improve consistency. In this...
3 min read
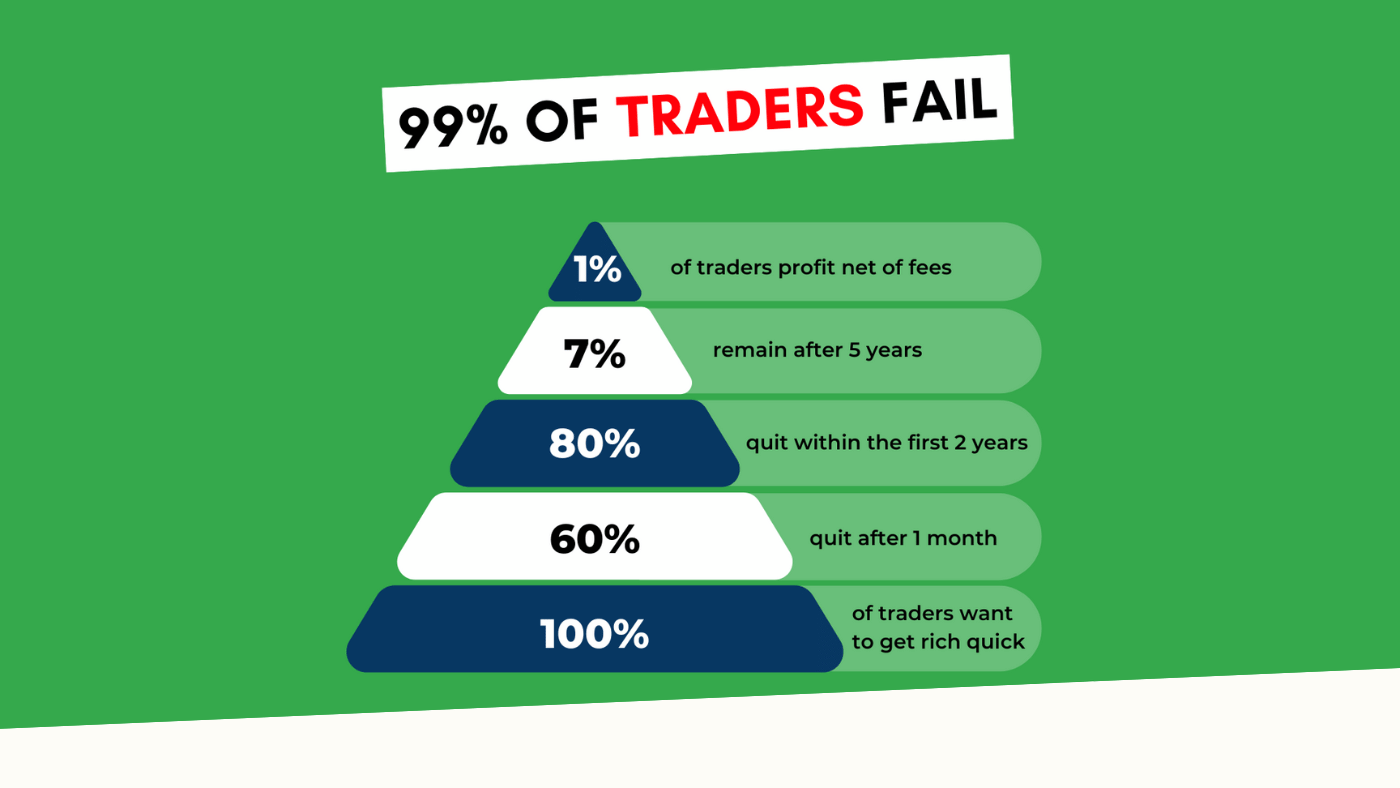
“95% of all traders fail” is the most commonly used trading related statistic around the internet. But no research paper exists that proves this...